Tivimate Setup
Tivimate in our honest opinion is one of the better IPTV apps out there. It will work with most android tv boxes that use a remote control. It doesn’t however work will with android devices that use a touchscreen. By purchasing a bluetooth remote control you can get around this conflict.
The initial install of Tivimate will be a free version. You can install and setup an IPTV service to test but with limited capabilities. We suggest you test it out before you buy. In this section we will explain how to setup TiviMate with the non-premium version and the premium version. Each setup is the same but the non-premium version restricts you to just one playlist entry with many of functions being restricted. For help purchasing and finding what is available in the premium version of TiviMate, visit our section on Purchasing TiviMate.
Initial Setup and Install
We will assume here that you have already installed the TiviMate apk. If TiviMate is available for your device, it will show up in Google Play Store. If it isn’t available in google playstore, then you can download and sideload the apk file from TiviMate.com. We will not go into how to do that here. Google playstore will not allow TiviMate to be installed onto most cell phones as it is not optimized for touch screens. TiviMate is optimized for android TV setups that use a remote control.
Once installed, open tivimate:
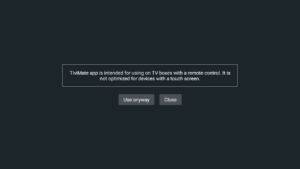
You may see,
“Tivimate app is intended for using on TV boxes with a remote control. It is not optimized for devices with a touch screen“
Click Use anyway. If you click Close, the app will close and will not be setup for use.
Add Playlist
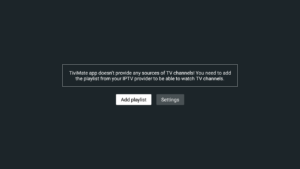
On the next screen you will see:
“Tivimate app doesn’t provide any sources of TV channels! You need to add the playlist from your IPTV provider to be able to watch TV Channels.“
Tivimate needs a playlist to operate properly. Tivimate alone does not provide any content at all. In order to view any video content, you either need to research free iptv providers or purchase one from a reputable company. We will not go into any detail about this.
Click on Add Playlist
Clicking on Settings will take you to settings without any playlist and will also give you a link to purchase TiviMate if you have not already purchased.
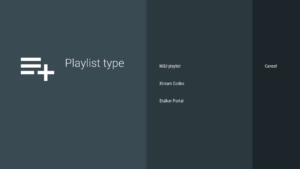
In order to add a playlist you will need info from your provider. They will either supply you with info for Xtream Codes, or M3U Playlist, or Stalker Portal. If you have a choice from your supplier, we suggest that you use the Xtream Codes. It is a more secure setup. Even if your provider only gives you an M3U Playlist url, you can pull info from that url and use if for the Xtreme Codes login. Therefore we will start with the Xtream Codes login. M3U playlists are the next best after Xtream Codes and use to be the standard. Stalker Portals seem to be fazing out as of late. But if you have a stalker portal account, you can try to use it in TiviMate. Otherwise, ask for an Xtream Codes login.
Xtream Codes
Click on Xtreme Codes
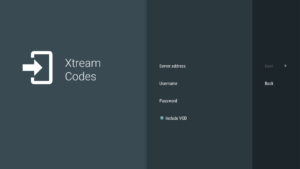
In order to use the Xtream Codes login you will need info from your provider.
- Server Address/URL (SERVER_URL:PORT)
- Username
- Password
Once you have this info, you can input it into the required areas below. Leave “Include VOD” checked.
If you were given an M3U Playlist url, you can pull info from this to use for xtream codes login. The address should look something similar to:
http://SERVER_URL:PORT/get.php?username=YOUR_USERNAME&password=YOUR_PASSWORD&type=m3u_plus&output=tsExtract the info in this format:
- Server Address = http://SERVER_URL:PORT
- Username = YOUR_USERNAME
- Password = YOUR_PASSWORD
Use your remote to navigate thru each section of the login details. When clicking on each detail section, a virtual keyboard should pop up on your screen to allow you to enter each detail. If you have a remote control app on your cell phone, this would be a great time to use it. It should allow you to copy and paste your details into each section. Check to ensure that your url includes the http:// or the https:// as provided by your provider at the beginning of the url. This is very important to insert the exact url as provided to you. The exact port number that is provided to you (:PORT) should also be used. Some servers may not require a port number. Remember that usernames and passwords are case sensitive. Input each exactly as provided to you.
Once all of your details are entered, navigate to the Next button and click ok on your remote.
If you see an error, you may have entered a detail incorrectly. Click the Back button and review the details you have entered. Remember that username and passwords can be case sensitive. If you entered everything correctly, you will see “Playlist is Processed”. Click on Playlist name to change to a name that is easy to remember and identify your Playlist. This name will also show in the guide. If you have multiple playlists in the premium version, this helps differentiate between each playlist. Once you have changed the name click Done.
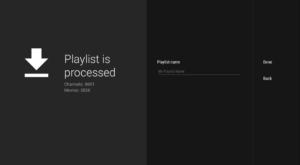
Xtream Codes setup is now complete. Once you have clicked done you will be taken to your main epg page and you can begin watching TV.
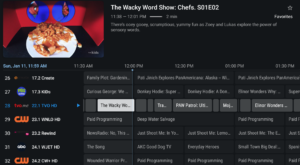
The above image is live OTA (over the air) channels and are not reflective of IPTV channels being used.
If that is all you want, just sit back and enjoy. If you want to learn more about what you can do with TiviMate settings and how to tweak just about everything you could imagine, go back to our TiviMate home page here and learn how use the epg efficiently and to change those little settings that mean a lot.
M3U Playlist
Your provider may need you to use an M3U playlist URL. The M3U playlist option requires a long url from your provider.
It should be in the form:
http://SERVER_URL:PORT/get.php?username=YOUR_USERNAME&password=YOUR_PASSWORD&type=m3u_plus&output=tsIf you were given an M3U Playlist url you can pull info from this to use for xtream codes login. We suggest that you use the info provided to use the xtream codes setup. In some circumstances you cannot use the xtream codes setup and M3U is the next best option. (The above url is not a real login and will not work.)
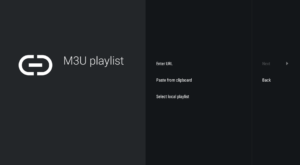
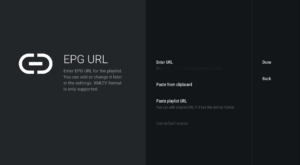
To enter the m3u url into this page you can either click on Enter URL to type in the url manually or use your remote control app for your android box. Or you can click on Paste from clipboard which will, of course, paste the url from the clipboard if you have copied that url within your device. If you happen to have an m3u or m3u8 file that was provided to you, your can use Select local playlist. This will allow you to browse folders on your device or network to install via the playlist file.
Click on Enter URL and add the URL that you received with your IPTV subscription. Once you have entered the M3U url, click Next
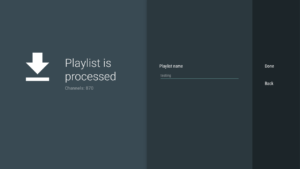
Once your playlist is processed, you can click on Playlist name and add your own unique playlist name. Change your Playlist name to a name that is easy to remember and identify your Playlist. This name will also show in the guide. If you have multiple playlists in the premium version, this helps differentiate between each playlist. Once you have changed the name click Done.
The next screen will ask you for the EPG URL. TiviMate will normally auto fill this in for you and the default can normally be used. It should be in the format of:
http://SERVER_URL:PORT/xmltv.php?username=YOUR_USERNAME&password=YOUR_PASSWORDIf the EPG URL is not correct, you will either see an error or your guide will not populate correctly. Some providers will supply you with the correct epg URL. Check your activation email or contact your provider for the correct URLs if the auto filled EPG URL does not work.
Once you have verified your EPG URL, click Done.
Once you have clicked done you will be taken to your main epg page and you can begin watching TV.
The above image is live OTA (over the air) channels and are not reflective of IPTV channels being used.
If that is all you want, just sit back and enjoy. If you want to learn more about what you can do with TiviMate settings and how to tweak just about everything you could imagine, go back to our TiviMate home page here and learn how use the epg efficiently and how to change those little settings that mean a lot.
Stalker Portal
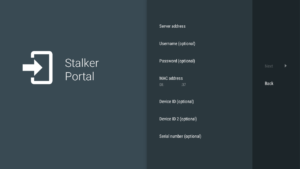
To use the Stalker Portal setting, you are required to send your MAC address to your IPTV provider. This setup is a newer addition to Tivimate within the last couple of years. But at the same time, many providers are phasing out Stalker Portal setups. If you already use the Stalker Portal setup on another box, you could possibly switch to this. In reality, you should just switch to using Xtream Codes login. In order to setup the stalker portal, you should contact your provider, so they can talk you out of using this setup.
Because we don’t use the stalker portal setup and it is the least favorable of all the setups, we will not go into more details about how to set this up.
Please look into using the Xtream Codes or M3U setups.